Friday, June 26, 2015

Pop Art Candy Paintings


On 8 by 10 inch Canvas boards the students each chose a type of candy to use for their pop art paintings.We had a set of paints that only included the primary colors, red, yellow and blue, and white and black. We did some color theory to begin this project and the students mixed to create their colors. Here are some of the results so far.. what surprised me the most during this project was how quiet it got while they were painting! For a summer school class they were very focused and enjoyed themselves!

Tuesday, June 23, 2015

Monsters! Monsters! Monsters!

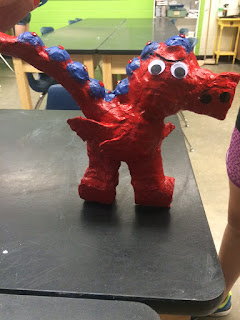
Imagine you have been hired by PIXAR to create new monsters for the next Monsters INC movie...

Thats just what my 7th and 8th grade summer school students did this week. We watched a short snip from the first Monsters INC, and began sketching and making our monsters. I had a hand out with different monster types for inspiration, but a monster can really be anything so the students felt inspired to work right away...Here are some of the sketches we started with..and the end result of our Monsters!

Pre-Drawings

                            Name: Celtic                                               Name: "Peace sign" Bob

               
                                 Name: Cheerily                                                 Name: Earl

                
                                 Name: Billy Joe                                       Name: "Big Feet" Fred

                                                           Name: Silly Nilly                                               Name: Blooby  

                 
                                 Name: Furry Murry                                           Name: Rex

               
                                  Name: Mike Wazowski                                   Name: Cindy

                                                                    Name: Angry Red
                                                                      

Materials Needed:

-plastic grocery bags
-newspaper
-toilet paper rolls/paper towel rolls
-styrofoam boards
-cardboard
-tape
-plaster
-paint
-feathers
-fur
-google eyes
-eye lashes (like the ones they use on dolls, found them in the craft aisle at hobby lobby)


Summer School in AASD

Aluminum Foil Personality Letters 


For the first two days of summer school I wanted to focus on getting to know my students. We used foam board and exacto knives to cut out the letter of our first name. We then used tacky glue to draw our designs and patterns. The students were encouraged to use simple designs and patterns, not too complicated. It was difficult to get exact details. Day 2. after they dried, we covered them with foil and colored the foil with sharpies. 

Materials:
Styrofoam Board
Exacto Knives
Colored Sharpies
Tape
Aluminum Foil
Tacky Glue 


Monday, June 1, 2015

Drawing for a Co-Worker..


A co-worker this year at Wilson Middle School asked me to do a portrait of her friends baby. The baby unfortunately had passed away from SIDs. This made me especially emotional about doing a good job on this piece for the family. I began working on this around conferences in October and finished it around Thanksgiving. She intended to give it as a christmas gift to the family. I later recieved the nicest thank you card from the family telling me that they loved the drawing and thought I captured his face perfectly. This made me feel so good, and I was happy to do it for them, and even happier that they loved it! 

Friday, May 1, 2015

1 Point Perspective Rooms- 7th Grade

Students learned about One Point Perspective this week. We started out simple with basic squares using a vanishing point and horizon line. Each day I showed them a more complicated step to get them familiar with using the vanishing point. The final steps of this unit was to design their own bedroom. The results were fantastic! I believe they show a great understanding of one point perspective.


Saturday, August 30, 2014

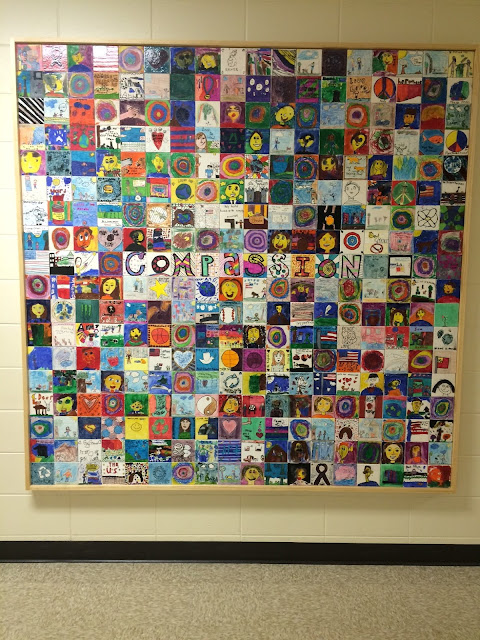
Finished Mural at Black Creek School


Really proud of how my first mural turned out! The students did a great job, and the finished product will be displayed at the school for many years to come! It will serve as a daily reminder of how compassion is used every day. 

Wednesday, June 25, 2014

Sharpie Tie Dye!

 
For my summer school "Field Day" activity we needed a quick project the kids could do in 15 minutes. We did fabric squares with sharpie tie dye! This project was a favorite so far of the summer school artists! The only materials you need are plastic cups, rubber bands, colorful sharpies, rubbing alcohol, and for the fabric I used Muslin because it was cheap and easy to cut. This project could easily be done on a T-shirt or a bandana. We cut 6 by 6 inch squares for the activity today. The students started by drawing on the fabric, we pulled the fabric tight around the cup by doubling up the rubber band. When the students are finished we dropped a few drops of rubbing alcohol and watched the magic happen! The design slowly starts to spread out and blend together, mimicking the look of actual tie dye. After the center design dried, we took the design off of the cup and some students added more designs on the edges. This was a great summer art project!